How to Install a Package of Bees in a Top Bar Hive
Package Bee Installation in Top-Bar Hives
This page begins with the installation of a package of bees in a top-bar hive with a procedure that I have used since the 1980’s, even though I have been working with packages since the 1960’s, sometimes hiving 25 in a morning (back then in frame hives). My book describes the procedure for top-bar hives and the videos summarize everything with motion.
While I can make my own packages (but without the syrup feeding cans), in the spring of 2013 I bought two three-pound packages (even though they were expensive) like a beginning top-bar-hive beekeeper. I started these new colonies with only my foundation strips, no combs as an extra boost, again, just like a beginning top-bar-hive beekeeper who has no comb.
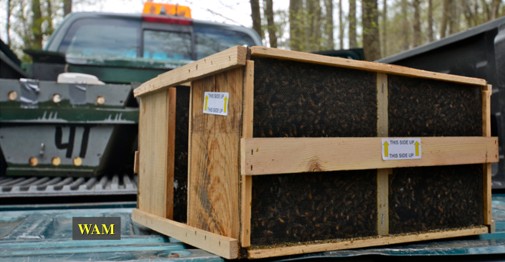
Here are the packages.
For a package, first remove the syrup can and queen cage. After prying off the wooden cover, usually the syrup can is pried out with the hive tool, a perfectly good way. I use a quicker method, very handy when installing many packages at one time and working alone. I give the package a quick upward jolt and catch the can when it pops up (first make sure the can is vertical).
Here is the video removing the syrup can and queen cage.
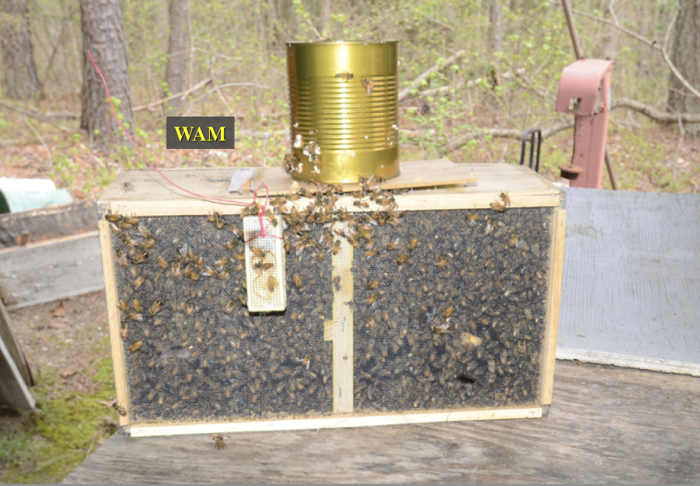
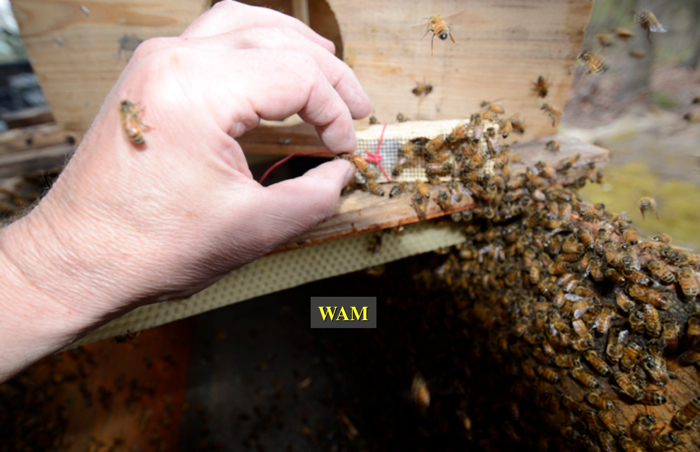
Here is the bee package with the queen cage wired for suspension between the top bars of the hive as instructed in my book.
The First Example: Package Bee Installation in Top-Bar Hives
The first package bee installation is in a five-foot top-bar hive with a wooden floor. After the filming, I added voice-over instruction to the video.
First I install the bees in the hive as shown in this video, installing the first bee package. This hive and the next are under a shed roof so I am not putting on the metal covers.
About three hours later, I check the hive again to make sure the bees have clustered around the queen cage. The other job is to move up the feeder as described in the top-bar hive book and shown here in the next video, checking the first package after three hours.
After three days, I check the queen cage for her release. If the queen is out of the cage, check the combs for eggs. If eggs are in the combs, one egg per cell in the center of the cell (queen-laid eggs), close the brood nest combs. Do not disturb the bees further by looking for the queen. With eggs found, you know the bees have accepted the queen, at least provisionally (see the book for more details on that). Keep the combs vertical when looking for eggs, especially if you are used to tilting frames from frame-hive beekeeping. When I look for eggs, a picture of eggs in new top-bar cells will appear as a PIP (picture in picture) with the light coming through the paper-thin cell floors since there is no “thick” foundation wax as with frames. Here is the video checking the first package after three days.
The Second Example: Package Bee Installation in Top-Bar Hives
Stopping Package Bees from Possibly “Absconding” from a Top-Bar Hive
The second package bee installation is in a three-foot top-bar hive on a screen floor. I noticed two bees balling the queen cage, which made me mildly suspicious that there might be problems with this package, given that the bees were with this queen for about four days and no attendant bees were in the cage (conditions promoting queen acceptance). The package installation proceeded normally as shown in the video installing the second package.
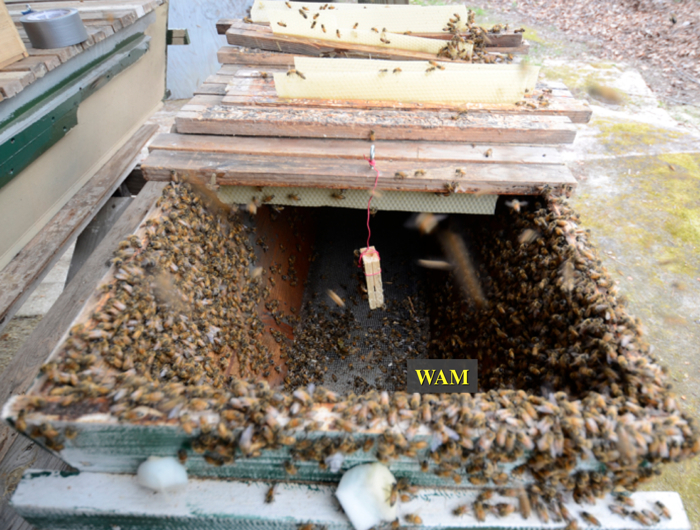
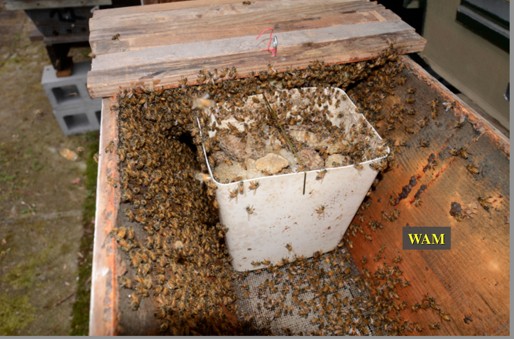
On the three-hour inspection, no bees clustered around the queen cage as shown below standing in front of the hive.
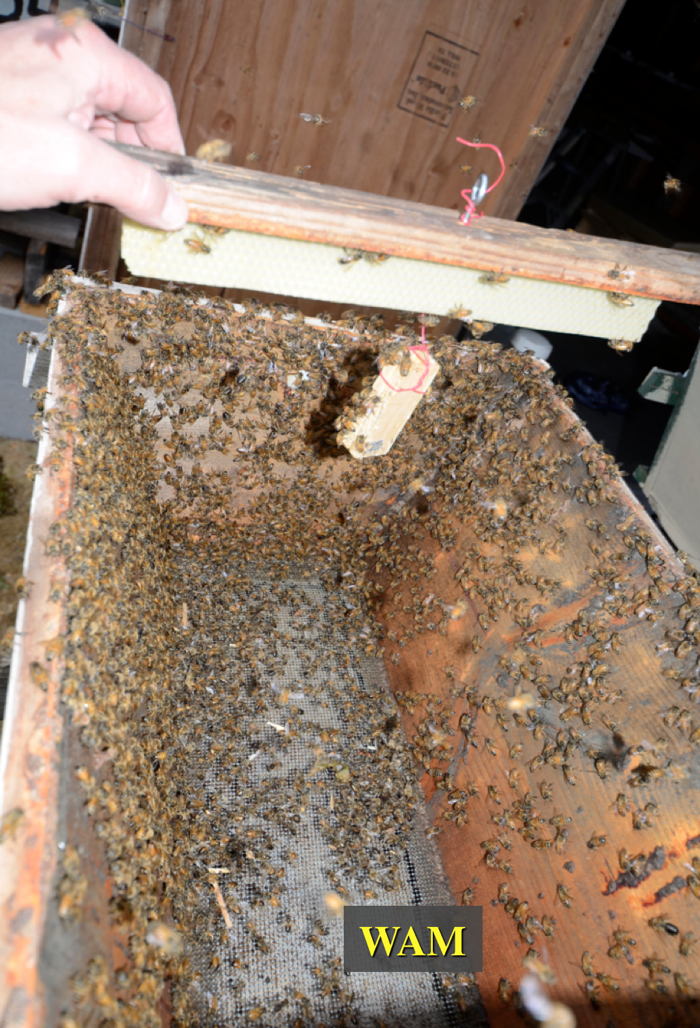
Here is another view of the bees in the hive, standing beside the hive looking to the front (entrance) end. The bees show virtually no interest in the queen in the cage. Notice the lack of bees in the front end of the hive – hardly three pounds of bees. Where are they?
Most of the bees are in the back of the hive clustered behind the feeder for some reason. Here is the picture.
With this lack of interest and the hostility towards the caged queen (the bees balling the queen cage), I figured an extra queen was in the package and now somewhere in the hive. Now the bees could abandon the hive, flying away with the extra queen. Looking through the bees scattered in the hive, I found the extra queen in about 90 seconds. Here is picture of me holding the extra queen with the caged queen in the background (I am holding the camera too). (In the previous picture, I put the top bar with suspended queen cage in the cluster at the back of the hive while I made a nuc for the extra queen. Then I moved that cluster and queen cage up to the front of the hive were it all should have been as described below in the recommendations.)
While completely unplanned, this situation does provide an exceptionally good teaching example of (at least) one way to keep the bees from abandoning or “absconding” from a top-bar hive right after installing a package. I have received emails about this problem, which is an expensive loss. So here is my advice.
Conditions
The bees do not cluster around the queen cage on the three-hour inspection (with the queen cage installed in the hive as instructed in my book.) Another possibility might be if the weather were too hot, which might cause lack of uniform clustering around the queen cage.
Recommendation:
For choosing the queen of the new colony, use the queen in the cage; do not rely on a loose queen because the bees could leave the hive since they have no comb. Also the extra queen could be a virgin queen subject to becoming lost on her mating flight. The queen in the cage is mated. Also the bees need to build some comb before the queen is allowed to move among the bees so empty cells will be waiting, ready for her eggs.
Look for an extra queen among the bees. She may be small. An exceptionally good beekeeping skill is to know what a queen looks like by just seeing her eyes, face, legs, just – parts. Finding her confirms the lack of interest in the caged queen.
After removing the extra queen, find any bees that have clustered from any top bars (like in the back of the hive in the example above), and keeping those top bars together as a unit, move them to where the bees should cluster (one foot from the entrance end). Put the top bar with the queen cage with those top bars (or just move the queen cage). You want to “build” a starting cluster around the queen cage. Since that cluster contains a queen, the other bees, realizing they are queenless, will join it.
Keep in mind this work involves fairly complicated advanced apiculture, and slightly different conditions could alter my recommendations, but I hope they will be helpful in keeping bees from “absconding” from top-bar hives.
Next is video of the me finding eggs in the new combs of the second package colony (that had two queens), at three days, an inspection like the first package. When I look for eggs, a picture of eggs in new top-bar cells will appear as a PIP (picture in picture). With new top-bar combs, the floor of the cells is paper thin, no “thick” foundation like with frame. With this PIP, you are actually seeing the eggs on the Other side of the comb, where the camera focus was the best. Here is the video of checking the second package bee colony at three days.
I will add more videos and pictures as the season proceeds.
To learn a complete system of beekeeping for top-bar hive beekeeping, please go back to the Welcome page to order the book.
It takes a lot of time to accumulate the photographs and videos and write these detailed pages. Please consider supporting this top-bar hive information with the donation button below. You do not need a Paypal account. Paypal just moves the funds and keeps everything secure. After clicking the Donate button, look to the lower left of the screen to the pictures of the little credit cards. Click the blue “continue” and places to put in credit card information will appear. Thank you.
Kind regards,
Wyatt A. Mangum, PhD
